One of the great things about mead is the variety of recipes that can be created, and the experimentation that results when fermenting with new yeast strains. After reading about the natural occurrence of wild yeast, I wanted to try my hand at capturing a yeast strain for brewing. So, after culturing wild yeast, I set out to make the following Wild Yeast Session Mead Recipe.
The actual process of capturing a wild yeast is a future topic to be covered in the MeadMakr Guide. For now, those seeking more information should check out Bootleg Biology’s handy DIY yeast capture reference.
The Recipe
Volume: 1 gallon
Honey: 16.44 ounces Trader Joe’s Mesquite
Other ingredients: None
Yeast: Wild Yeast, collected Aug 2013, cultured Nov 2013, brewed Feb 2015; decanted majority of water from culturing flask; pitched 1/4 cup yeast slurry into batch (were I to try this with a commercial yeast strain, I’d probably choose Wyeast 1388 or Lalvin 71b)
Yeast nutrient: 1 tsp, half at pitch, half at 24 hours
Yeast energizer: 1/2 tsp, half at pitch, half at 24 hours
Ambient temperature: 67 deg F
Original Gravity (OG): 1.042
Bottle conditioning process: Dissolve 1/4 cup honey into 1/2 cup water. Pour into racked contents in secondary fermenter. Gently stir contents to disperse priming sugars throughout mead.
The Process
Dissolve honey into 1/2 gallon water at room temperature. Pour contents into 1 gallon carboy. Pour first half of nutrient and energizer additions into carboy. Shake well to aerate must and dissolve nutrient and energizer. Pitch yeast, and fill carboy to the shoulder with room temperature water. In my case, ambient temperature was 67 degrees for the entire fermentation.
Degas mead three times daily for the first three days. 24 hours after pitching yeast, add remaining yeast nutrient and energizer. To avoid mead eruption accidents (MEAs), it is advisable to dissolve this addition in a small amount of water before adding to the carboy.
Rack contents from primary carboy into secondary carboy when fermentation has stopped (specific gravity (SG) = 1.00 or less). There is no need to wait for the mead to completely clear, as cloudiness in suspension will include the yeast needed for bottle conditioning.
Two weeks after racking to the secondary fermenter, add priming sugar via the bottle conditioning process above (dissolve 1/4 cup honey into 1/2 cup water). Bottle after gently stirring priming sugar into carboy. To ensure proper carbonation, wait at least two weeks after bottling before drinking.
Recipe yields nine to ten 12-oz bottles depending on racking losses.
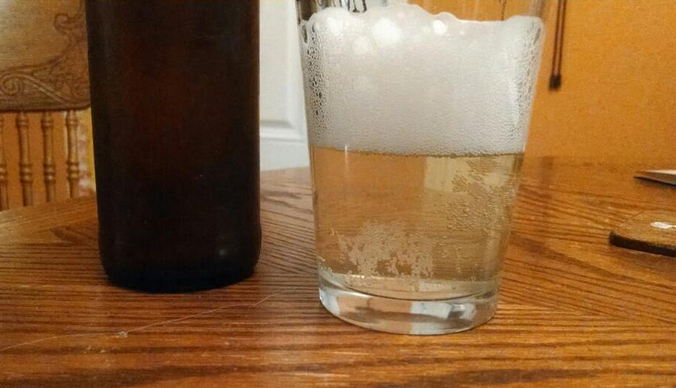
Tasting Notes
This mead finishes dry at approximately 7% alcohol. The taste will be reminiscent of a dry cider crossed with a dry champagne, with additional flavors impacted by honey and yeast selection. This wild yeast imparted a certain sour mustiness to the finished product, leading me to think there are likely a few lactobacillus or brettanomyces strains present in the biological makeup of the yeast sample. However, given the thinness of the mead, these flavors provided complexity to help balance the flavor profile, and the resultant beverage was pleasant to drink.
I’m taking a similar approach, but using about 3 lbs of honey and 3 gallons of water. I’ve never made mead before, but brewed quite a bit of beer and made successful ginger bugs for ginger beer/soda – hopefully I’m not jumping in too deep with my first mead.
Couple quick questions –
What do I need to do to ensure I have a larger/healthy enough bug to effectively ferment 3 gallons?
I really want this to be ginger heavy, so I plan on boiling the water with some freshly chopped ginger beforehand. Obviously plan on cooling and straining the water prior to adding the honey and pitching the bug – good idea or bad idea?
I like to start my wild bugs small, harvesting from a wild yeast strain on fruit or berries if you can. Grow that in a mason jar or stir plate (only stir a few minutes a day) for a couple of weeks with some small additions of sugars and nutrients every couple days. Around 14 days into most wild fermentations yeast become the most dominant micro-organism. Once you have that going strong, brew up the ginger base and go from there. Wild bugs are fickle, so don’t be discouraged if the first goes bad. I got lucky on mine, and after a few batches it’s now a sour strain with very little resemblance to that first batch.
Thanks for the reply. Is the fact that I’ve started my bug with ginger as opposed to fruit or berries an issue? And are there any risks using the bug after a week instead of 14 days? What is the biggest indicator that tells you the bug is ready to go?
You shouldn’t have any problems. Ginger should have some wild yeast present as well. I’ve never made a ginger bug, so I can’t speak specifically to how it would differ from my experience growing yeast from fruits and berries.
Your best indicator will be that you have some sign of fermentation in your starter. Do you get any faint traces of alcohol in the nose? Smell is your best indicator for healthy at this point. You want to maximize an environment for yeast and not bacteria or mold. The 14 days helps with that, but other bugs will always be present when you go with wild fermentations. Your hope is just that the wild yeast will take over.
Other options are to grow from a single cell to a large population by scraping onto a petri dish. See bootlegbiology.com for more info. Out of scope at this point, but a good resource for learning about wrangling single yeast strains for home use.